Friday, October 10, 2014

Crustless/ Gluten Free Quiche with CSA Greens

So many greens this summer.  I was running out of ideas for collards and chard.  I started blanching and freezing my greens.  Then, I bought too many eggs.  Quiche!  Thats the answer!  Traditionally, quiche is made with spinach.  Why not try other greens?  I used chard for this recipe but I'm sure it would be delicious with collards, too.
As Ive mentioned, Im gluten intolerant.  This recipe is crustless because Im much too lazy to find a recipe to make a gluten free crust.


Crustless Quiche
1 tbs oil
1 onion, finely diced
1 clove garlic, minced
10 oz of greens
5 eggs
3 cups cheese (I used a mix of sharp cheddar and Mexican blend)
1/4 tsp salt
1/8 tsp pepper
**5 slices of ham or bacon (optional), cut small

Preheat oven to 350*, prep a greased 9in round baking dish

In a large skillet or dutch oven heat oil.  Saute onion and garlic in hot oil until soft.  Add greens and ham, cook until greens have lost most of their moisture (about 5 minutes)

In a large bowl beat eggs.  Add cheese, salt and pepper and mix well. 

Add cooked green mixture (be careful that the greens are cooled slightly so that the eggs dont start cooking). 


Pour mixture into pan and bake until egg is set, about 30 minutes.


Allow to cool before serving.  Best served at room temp.

*I made a double batch using thawed greens that I had blanched and frozen in August.  Make sure that they are completely thawed and squeeze out as much water as possible before cooking.  I froze one of the quiches after I had cooked it.  You can just thaw it and eat or you can heat it slightly in a 350* oven for about 10 minutes.

Mexican dinner CSA & gluten free style

I know that I havent been here in a while... ya know... life happens.  I have a back up of 3 blogs, stay tuned for more in the next day or so.

Im sure (or maybe unsure?) Ive mentioned that I have a lot of food issues.  Lactose intolerant, soy intolerant and, most recently, gluten intolerant (luckily, it isnt full Celiac).  You will notice that the recipes I've posted this year are lacking these ingredients.  Yes, there is cheese in a bunch of the recipes but it is low or no lactose cheese.
*Side note for those curious: milk allergy is different from lactose intolerance.  This means that I can still have dairy but it has to be low or no lactose dairy.  Yogurt is a "yes" because it has active cultures that counteract the lactose.  Aged cheeses are a "yes", as a cheese ages the lactose breaks down.  I can each sharp cheddars and Swiss but fresh cheese like mozzarella is totally out without a Lactaid.  Of course, some are more sensitive then others.  My sister is also lactose intolerant but she can eat a couple slices of pizza with only a little effect.  I eat half a slice of pizza without a Lactaid and my stomach will do highly unpleasant things that incapacitate me.  

All that is neither here nor there... on to the food!

Fresh Mexican Dinner
This is a 3 parter:  Taco chicken made with homemade (g/f) taco seasoning
                             fresh Pico de Gallo
                             Spanish Rice in a rice cooker
Full ingredients for all parts:
2 large tomatoes
2 onions (I like and used red onions)
2 cloves garlic
1 lime or 1 tbs lime juice
salt
6oz tomato paste (I dont keep this in the house, although I should.  Below you'll find how I subbed)
2 tbs butter or margarine
1 c rice
2 1/4 c liquid, either water or chicken broth
1 tbs chili powder
1/2 tsp garlic powder
1/4 tsp onion powder
1/4 tsp crushed red pepper
1/4 tsp dried oregano
1/2 tsp paprika
1 tsp pepper
1 lb chicken breast, cooked & shredded (you can buy canned or bake 350* for 25 minutes)


Lets start with the Pico.  This recipe is my adaptation of a recipe adapted from www.earlymorningfarm.com/easy-pico-de-gallo 

Pico de Gallo
2 large ripe tomatoes, diced
1 red onion, finely diced
1 red bell papper, diced (i used what i had: 1 yellow & 1 sm red)
1 clove garlic, minced
Juice of 1 lime or 1tbs lime juice
1 tsp salt
                                       

Combine tomatoes, onion, pepper.  Add garlic, lime and salt, tasting as you go and adjusted to taste.
Refrigerate.  Will keep a couple days.


Next, start the rice.  I used my trust rice cooker.  If you aren't rice challenged like I am, you can make it stove top using the same basic steps.  I didnt have chicken broth so I used water, which tasted just as good. You can also use water to keep the rice vegetarian.  

Spanish Rice
1 cup uncooked rice
2 1/4 cup liquid (I used water but you can use chicken broth)
6oz tomato paste **see below recipe for sub**
2 tbs butter or margarine
1/2 cup diced onion
1 clove garlic, minced
salt & pepper to taste

Place all ingredients into your rice cooker and cook according to cooker's directions.  It may finishing a little liquidy, mix it and let set in your cooker a couple minutes and it should thicken up.

**tomato paste substitution.  
Dice 2 large tomatoes.  Simmer in a heavy pot for 30 minutes.  Use a masher or stick blender to break down tomato.  Simmer another 15 to 20 minutes until thick.  This wont have the smokey tone that paste has.  I still enjoyed it.  You can add a little paprika for a more smokey flavor.


Having a gluten intolerance, Im really careful of seasonings.  Many seasonings and flavors use wheat-based binders and preservatives.  You can find gluten free taco seasoning fairly easy, but why, when you can make it yourself with things most people have on their spice rack

Taco Chicken with homemade Taco Season
seasoning: (good for 1 lb of meat)  
1 tbs chili powder
1/2 tsp garlic powder
1/4 tsp onion powder
1/4 tsp crushed red pepper
1/4 tsp dried oregano (*pro tip: crush dried herbs in palm of hand before adding.  It releases the oil and refreshes it)
1/2 tsp paprika
1 tsp salt
1 tsp black pepper

Combine all season ingredients and whisk well or use a grinder

Taco Chicken (or tofu!) (or ground beef)
1 lb cooked, shredded chicken (or 1 package firm tofu cubed) (or 1 lb ground beef browned)
1 taco seasoning
1/4 cup water


Heat chicken (or tofu) in skillet.  Sprinkle seasoning over meat.  Add water and stir well.  Simmer 5 minutes until water is mostly cooked away.  The water will keep the meat from drying out while cooking. 

Voila!... or Ole?  Serve meat over rice and pico over meat.  Can add cheese and sour cream as you like.  I felt it was lighter and fresher without heavy dairy on it.  Really, using the substitutions, it can be completely vegan. 


Sunday, August 31, 2014

Beets 2 ways: Raw beet salad and Pickle beets

There were crime against vegetables in my home as a kid.  I dont blame my mom, she cooked things the way her mom did.  But canned beet boiled to death?!  No wonder I thought I hated beets.  I have now learned differently.  Beets are wonderful... and fun to play CSI: Kitchen.  This week in my CSA share I received 4 large beautiful beets, garlic and another purple onion (yes!  I know they are really called red onions but they are really purple).  I decided I wanted to try something other then my usual, cook with butter and cinnamon.  I came up with a tangy raw beet salad and a single batch sweet & sour pickled beet.  They were super easy to do at the same time.


I had to take a picture to show perspective of how large these cloves of garlic are.  That is a quarter!
Amounts shown in recipes are for "normal" sized cloves, not these monstrosities.


Tangy Raw Beet Salad
2 md beets, peeled and julienne
1/2 md red/purple onion, cut as desired (Im not a huge onion fan so I diced mine)
4 cloves garlic, minced
Dressing
1 Tbs olive oil
2 Tbs vinegar
2 tsp horseradish mustard (if your market doesnt carry this wonderful treat, just use Dijon)
1 Tbs lemon juice
Salt & pepper to taste


  • In a bowl, whisk together dressing ingredients and refrigerate
  • Mix together prepared beets, onion and garlic
  • Toss with dressing.
  • Let sit in refrigerator for 1 hour before serving to let flavors intensify


Sweet and Sour Pickled Beets
2 md beets, peeled and sliced
1/2 md red/purple onion, sliced
2 clove garlic, sliced
1/2 tsp cinnamon
1/4 tsp nutmeg
pickling brine:
1c vinegar
1c water
1/8c salt
1/8c sugar 
  • In small pot bring to boil, vinegar, water, salt and sugar.
  • Boil until salt and sugar are dissolved. 
  • In a quart jar or medium size tupperware container, place beets, onions, garlic, cinnamon and nutmeg.
  • Pour in enough brine to cover.  Put lid on tightly and shake to mix up.  


*This is for a single batch in the refrigerator.  Let sit 3 or 4 days before eating.

.


Thursday, August 28, 2014

Quinoa Sliders

This is one of my favorite non-meat meals.  We only discovered the wonder of quinoa in the past year or so.  Its a South American grain that is high in protein.  Generally, when cooking, I treat it like rice.  Follow the basic rice formula of 2:1 (2c water :1c quinoa or rice).  I dont usually rinse mine because I like the starchiness.  Best cheat is to just use a rice cooker.


Quinoa Sliders
1 c quinoa
2 c water
4 cloves garlic, minced
2/3 c of cooked greens (in this case I used leftover chard)
1 medium red pepper, diced
1 medium onion, diced
2 large eggs
1/2 c shredded cheddar
*1/2 c bread crumbs, adjust for moisture (Im Celiac so I use ground corn Chex)

Bring 2 cups of water to boil.  Add quinoa.  Cook 20 minutes, until water is cooked out.  (As I said, I just throw it all in my rice cooker)

While quinoa is cooking, cook down the chard by ripping it into pieces and cooking with a small amount of water.  Once chard is cooked, use a wand blender or food processor to break it down.


Cut up garlic, onion, and peppers while quinoa cools


 In a separate bowl beat eggs.  
Mix together all ingredients
*adjust the amount of breadcrumbs, it should be just moist enough to hold a patty shape


Form into even patties (I use an ice cream scoop) and place on baking sheet or plate
Place in refrigerator for 30 minutes to set up

Heat a large skillet with just enough oil to coat the bottom.  
Fry the patties for 4 minutes per side.
(If they arent cooked enough they may fall apart... but they will still be yummy!)


I like to eat mine with a little horseradish-Dijon.

Makes about 12 patties.


Monday, August 25, 2014

Summer Potato Veggie Bake

Once again, I decided to use as much as I could at once to make something delicious.

Summer Potato Veggie Bake
3 medium potatoes- sliced
2 medium purple onions- sliced
4 large garlic cloves- sliced
3 medium tomatoes- sliced
olive oil
salt & pepper to taste


  • Slice the potatoes, onions and tomatoes about the same thickness (I used a mandolin slicer)
  • Thinly slice the garlic
  • In a greased baking dish (you'll see I used pie dishes but that wasnt my first choice.  My baking dish had leftovers in it still) layer the vegetables; potato, onion, garlic, tomato, sprinkle with olive oil, salt & pepper, then add a final layer of potato.
  • Bake 30 minutes in 350* oven.  


I chose to layer in this order with intention.  This way as the tomatoes heat and seep moisture it will cover the rest with tomatoey goodness.  In other circumstances, I would have put a layer of bacon over the whole thing.
I used a variety of tomatoes that came in my CSA share the past 2 weeks, yellow minis, sungold and basic red tomatoes.  Im discovered a love of sungolds!


ADDENDUM: After cooking, I placed one of these in the freezer.  Pulled it out about a week later, defrosted, threw into oven (350 for 15 minutes) and it was delicious.  It got a little crispy but that just added something.

Refridgerator Garlic Dill Green Beans

Last week in our CSA we received green beans.  This week in our CSA we received green beans.  Normally I have to yell at my husband to keep his hands off, to save some beans for dinner.  But, oddly, we ended up with 2 bags of green beans in our crisper.  Often times, I'll can larger batches of vegetables but our apartment is warm and I was lazy.  I decided to make refrigerator garlic dilly beans.  Doing them this way they can last almost 6 months in the freezer... but rarely go that long uneaten.


Refrigerator Garlic Dill Green Beans
3 Pint size jars (you can even reuse jars from mayo, pickles, whatever but its better if they are glass)
lids (***something I just learned!  Peanut butter lids fit on the regular sized Ball jars!  And you avoid rust)

Apx 2 lbs green beans - washed & ends trimmed
1c vinegar
1c water
2tbs sugar
1/4c salt
per pint sized jar
1/2tsp peppercorn
1 clove garlic- sliced
1 sprig of fresh or 1tsp dried dill

  • Stuff each jar with prepped green beans
  • place peppercorns, garlic and dill into each jar
  • In medium pot, bring to boil vinegar, water, salt and sugar
  • Pour hot brine over beans in jar, enough to cover.  Place lids on tight and refrigerate
  • Twice a day shake jar to keep ingredients from settling. 
Its just that simple.  Let it ferment in fridge for at least 2 days to the flavors concentrate.  It will keep up to 6 months.


Saturday, August 9, 2014

Mid-summer Ratatoulli Stew

Some of the fun of having a CSA is trying new vegetables.  
This is a delicata squash.  
Its considered a winter squash but is more related to summer squash.  Delicata is also known as a peanut squash or a sweet potato squash.  It is slightly sweet and the skin is edible.  They can be cook similarly to a butternut or acorn squash.  
This week I received some really great vegetables but was daunted with so many other things to get done I didnt have the time or the energy to look up recipes for each thing.  So, I threw it into a one pot stew (or as a certain perky show host would call it a "stoup".


Mid-Summer Ratatouille Stew
4 slices of bacon or prosciutto (if vegetarian sub 3 tbs margarine)
1 medium onion
2 tsp minced garlic
1/2 cup wine
2 medium delicata squash
3 medium beets
2 medium yellow squash
2 medium tomatoes
2 medium bell peppers 
salt & pepper to taste
1/2 tsp nutmeg
1 tsp cinnamon 
1/4 cup corn starch
** cut all veg to similar bite size
  • In stock pot or dutch oven, saute bacon/prociutto/marg, onion and garlic until onion is translucent
  • Deglaze the pot using wine.  (deglazing is simply using a liquid to loosen up the yum from the bottom of the pot)

  • Add 3 cups of vegetable stock and bring to boil.  
  • Add delicata squash, reduce to a simmer. Simmer for 10 minutes.
  • Add remaining vegetables.  Simmer 30 minutes.
  • Remove 1 cup of liquid from the pot and whisk with cornstarch.  Pour starch mixture back into the pot.  Bring back up to the boil then simmer for 10 more minutes.  
  • Test tenderness of vegetables with a fork.  If the vegetable slide off the fork then its finished.  
Dress with toast and a sprinkle of Asiago or a dollop of sour cream/greek yogurt.

I will freely admit that I am not a fan of chunky soups.  I generally not a fan of most soups with exception of chicken noodle and matzo ball soup.  I hit my soup with an immersion blender, threw a little parm on top and I was even happier.  

Friday, August 8, 2014

So Much Kale!!!


So much kale!  One thing you never run short of being a CSA member or having a community garden these days is kale.  The other day my parents, who are part of a community garden, asked what I do with kale.


First is the prep:
I like to rip it from the tough spine and then into pieces that are a little larger then bite size.
Then wash and dry the kale or use a salad spinner
Kale Chips (without a dehydrator)
Toss prepped kale with a drizzle of olive oil
Sprinkle with sea salt and toss again
Lay out on a cookie sheet
Bake 275* for about 30 minutes.  They will be done when they are dry and crisp.
**you can have fun with seasoning.  Try a little chili powder or garlic or Parmesan cheese. 
Kale and Collard Dinner salad
1 bunch prepped kale
1 bunch prepped collard
2 avocado, cubed
4 hard boiled eggs, diced
1 pint cherry or grape tomato
1/2 cup toasted pecans
6 strips of cooked bacon or diced ham
dressing;
1/2 cup of olive oil
juice of 2 lemons (about 1/4c)
2 cloves of minced garlic
2 tsp dijon
1 tsp seas salt
Whisk together dressing ingredients and refridgerate for 1 hour
Toss remaining ingredients together, then coat with dressing

Cooked Kale (or Collards or Chard) Side Dish
3 tbs of olive oil or butter
2 cloves minced garlic
1 small oinion, diced
1 large bunch of prepped Greens
Sea salt and fresh pepper to taste
In a large, heavy bottom pot (I use a dutch oven), sautee onion and garlic in the oil or margaine. 
Add kale/greens.  Mix until coated.  Cook on medium heat until well wilted, it will look very dark and moist.
*I like to add some dried cranberries

Blanching Greens
When in doubt, blanch and save it for later.  Blanching is a way to keep greens fresh, vibrant and preserving their nutrients while waiting it out in the freezer.  

Rip greens into bite size, wash and dry

I like to use a wire basket that folds


Place in a basket in boiling water for 3 minutes


Remove from boiling water and place into an ice bath for 3 minutes.  This stops the cooking process
*This is why I like a collapsible wire basket, it folds into itself keeping the greens from floating.*

Place cooled greens into a towel and squeeze out the excess liquid.
(I just use my clean hands)

Its now ready to freeze.


CSA member Tools of the Trade

Tools of the Trade:
This is my 2nd year being part of a CSA.  I have found a couple things that have made veggie prep and cooking so much easier:


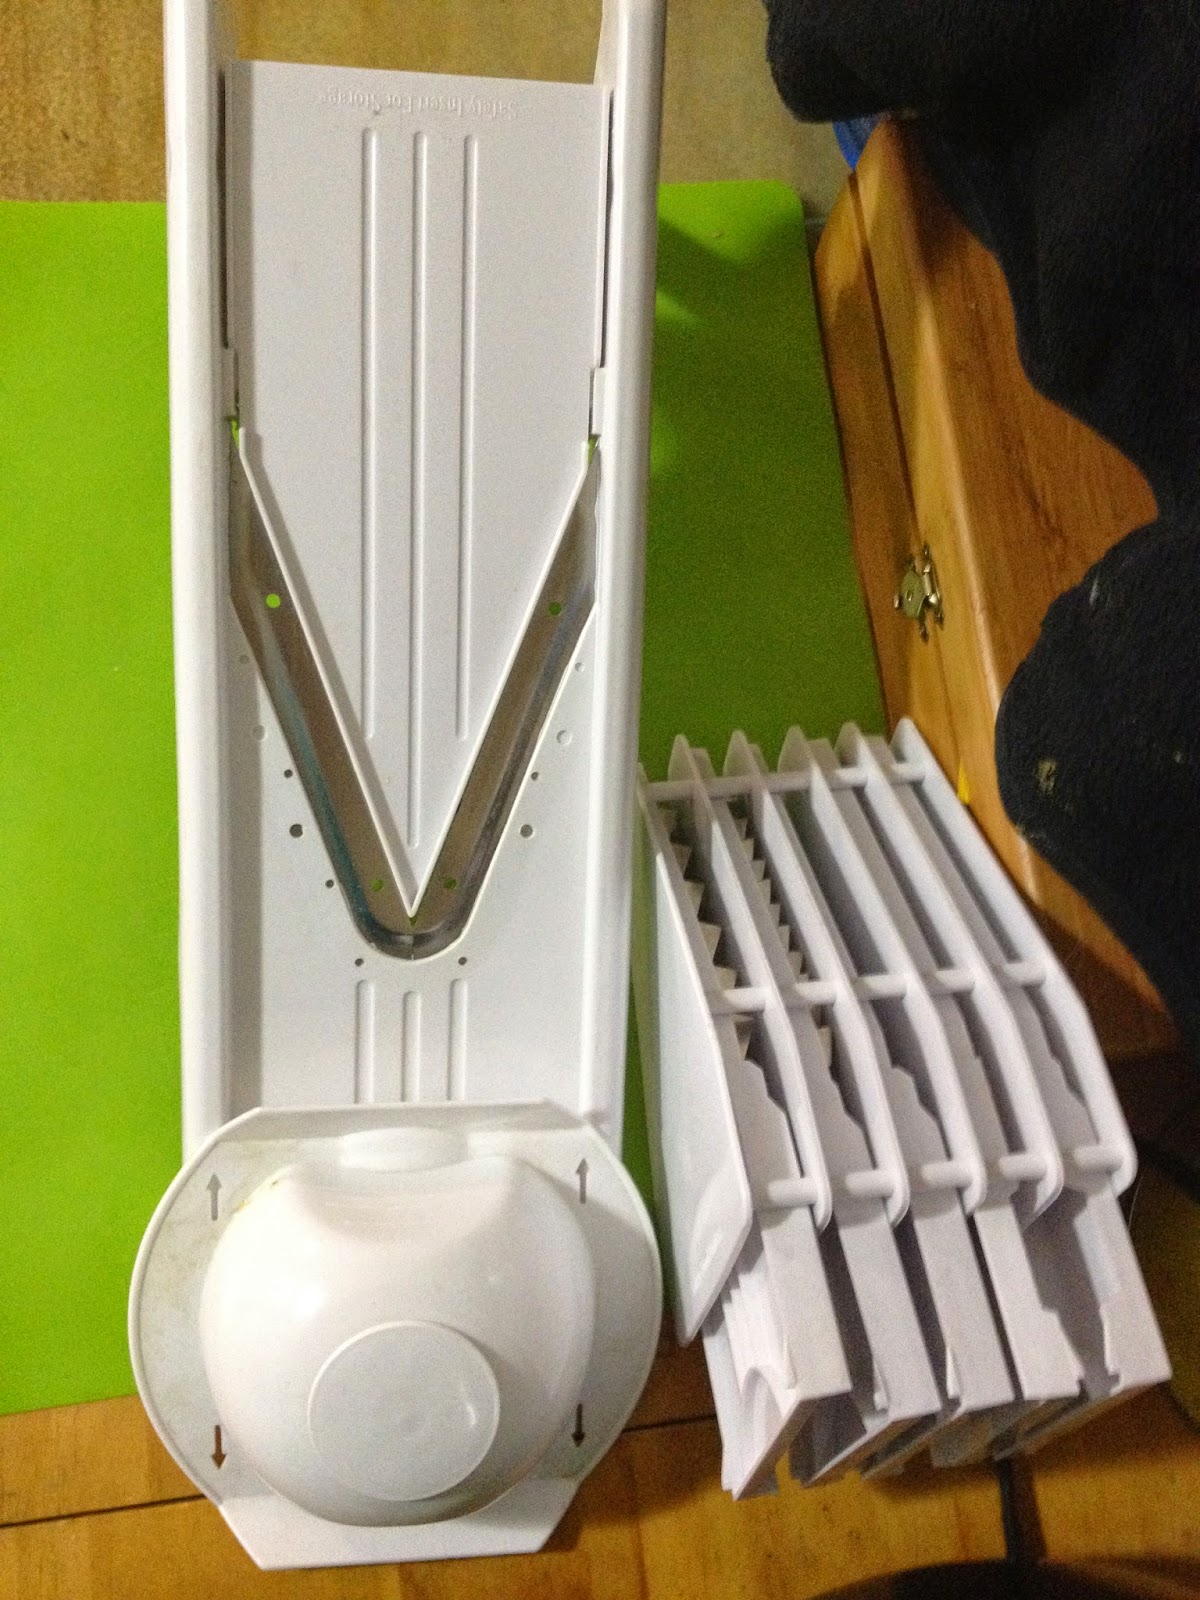
Mandolin Slicer: You can go low grade, like mine, and find them at the big box store for under $20.   Always use the guard!!


Salad Spinner: I had a time trying to find one last year.  This year I found one at the big box store for $5.  The biggest benefit is not the washing but the drying.

Scrap Bucket: I have a large bowl I keep in my freezer for the scraps.  Once that bowl get filled I throw it all in the crock pot with water, salt, pepper and a touch of wine.  Makes an awesome vegetable stock to freeze and use year round.

Wand/Immersion Blender:  My wand blender came with a mini food processor.  The wand part is great to smooth out soups but it is really the mini processor that is essential.  That thing has seen so much pesto.

Dehydrator:  Granted, most drying of vegetables can be done with a low oven.  But its summer so who really wants to heat the house up more.  The good thing about a dehydrator is that it can run over night without much worry that comes with running an oven unattended.
Flexible Cutting Board:  Seems a strange thing to be a "necessity" but when you are dealing with a large amount of vegetables it makes it so much easier and keeps vegetables from going astray as you try to put them into pots.
Rocker Blade Herb Cutter: Again, this is a time saver and a wrist saver.  Plus, if you're like me and have terrible knife skills, it makes you look like a pro.  Mine my parents brought back from a trip to Alaska many years ago.  You can see, its well worn.  

Large Stock Pot with Wire Basket:  This is a multi-purpose tool.  Yet, use it to make vegetable stock or soups, but you can use it to blanch vegetables for freezing or use it for canning.